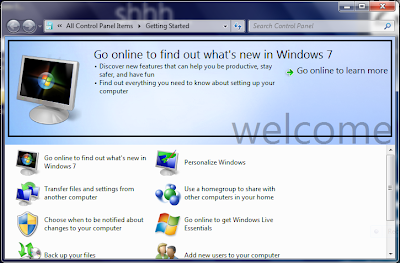
Change The Getting Started Header Background Image Using Resource Hacker
Categories:
Windows 7
The Getting Started program that is on your Windows 7 is a program that will show you what is new and all of the incredible features of Windows 7. But do you know that if we can change the header's background image using our custom image?
Well, to answer your question, just follow this tutorial and you can see that can we change it or not.
REQUIREMENTS
- Download Take Ownership option for file or folder in context menu
Download Take Ownership Option
- Turn off User Account Control (UAC)
- Install Resource Hacker
In order to modify a Windows 7 resource DLL file, you have to use Resource Hacker. If you don't have Resource Hacker, download it from our Useful Utilities page.
Visit The Useful Utilities Page
When Resource Hacker is successfully downloaded, execute the EXE file and install it on your PC
HOW TO MODIFY
Make sure the image that you want to use as the Getting Started header image is an image within the format of BMP.
1. Open up the RUN window by hitting the Windows + R combintaion, and type the System32 folder destination, C:\Windows\System32
2. On the System32 folder, navigate to the OobeFldr.dll file, and do a right click on that file.
3. On the right click context menu, first select the Take Ownership option, then do the right click again and select Open using Resource Hacker.
4. When the Resource Hacker window has opened, navigate to BITMAP | 102 | 1033.
5. Do a right click on 1033, and select Replace resource
6. On the new window that is showing, select Open file with new Bitmap
7. Select the bitmap file that you want to choose, and when done, click the Replace button.
8. Hit the CTRL + S combination while done. Restart your computer, and open the Getting Started program.
9. Now you can see the Getting Started header image is using your own Bitmap!
TIPS:
*To modify a system file, make sure you have done a Take Ownership option for the file
**To restore the original BMP, navigate your computer to the System32 folder, and delete the OobeFldr.dll file, and rename the OobeFldr_original.dll to OobeFldr.dll


0 comments:
Post a Comment